Please note: We highly recommend creating FTP users within WCP. Support may be limited for FTP accounts created manually
FTP, which stands for File Transfer Protocol, is an easy way to move files from one computer/server location to another. This is most commonly used by developers to upload new changes to their website that they had developed and worked on their local machine. Once they’re ready to push the new file(s), they use FTP to upload those new changes to the correct location on the server hosting their site.
FTP users are most commonly managed via a control panel. If you have access to a control panel, then we recommend using that to manage your FTP users as it tends to be easier to keep track of and manage the FTP users. You can see our guides on managing FTP users via cPanel or WCP if needed.
Create FTP User - Manually
For this guide we’ll use the following scenario:
- We want to connect using a user named ‘tutorial_user’.
- We need to have access to the C:\home\servermanagementco.com\wwwroot\ directory.
- We only want the IP Addresses 8.43.59.66 & 64.207.234.198 to have access, for security.
-
Now that we know the end result we’d like from the above scenario example let’s get started. Let’s first RDP to the server where we want to create this FTP user.
- If needed see our guide on connecting via RDP.
- If needed see our guide on connecting via RDP.
-
Once connected to the server, we need to create the new user. To create this user we need to access Computer Management > Local Users and Groups.
-
You can access this by using any of the below methods:
Option 1: Click Start menu, then click ‘Administrative Tools’. Then click ‘Computer Management’.Option 2: Use the Run function in Windows and enter ‘lusrmgr.msc’, then OK.
Option 3: Open CMD and enter ‘lusrmgr’, then click enter.
-
-
Once you are in the Local Users and Groups portal, right click on ‘Users’ and choose the option for ‘New User…’.

-
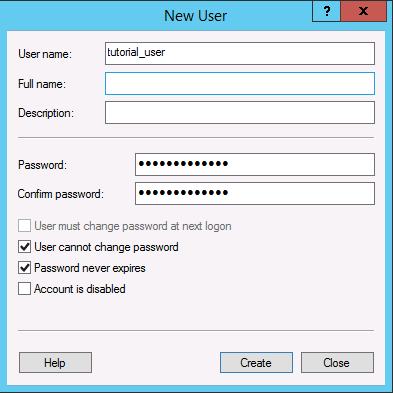
Enter the desired username for the FTP user, along with a strong password for the FTP User.
Note: Be sure to document the credentials for this user in a safe location, such as an encrypted password manager.
-
We recommend unchecking the ‘User must change password at next logon’, as well as enabling both ‘User cannot change password’ and ‘Password never expires’.
The choice for these settings is up to you, though.
Click the ‘Create’ button once you’re done.
-
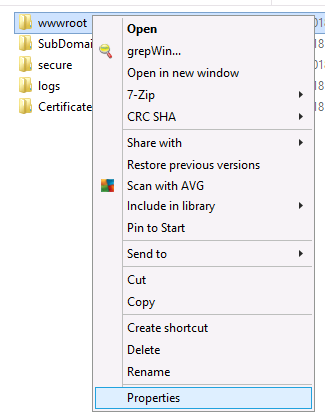
Now that the user exists on the server let’s set the folder it needs access to with the proper permissions. To do this right click on the folder this user should have access to and choose ‘Properties’.
-
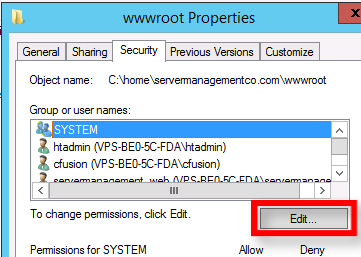
Now within the properties manager for this folder click on the ‘Security’ tab, then click on ‘Edit…’ so we can add the user to have permissions to this folder.
-
Now you will see a list of existing users that have access to the folder. Click the ‘Add…’ button now.
-
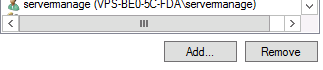
Enter in the name of the user you just created (in this case we created ‘tutorial_user’).
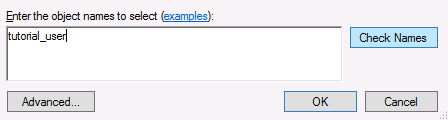
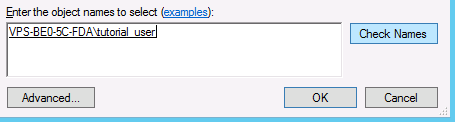
Now you’ll want to click the ‘Check Names’ button and you should see it picked up the user properly, as shown in the screenshot below.
-
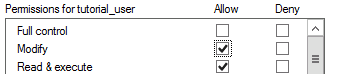
Now click ‘OK’. Once done we recommend that you choose ‘Modify’ for the permissions in addition to the default so that the user can write and make changes. Once done click on ‘Apply’ so that the user is then added to the folder with the proper permissions.
-
Now, we need to set up the ability for FTP connections to be made via this user. To do this, open IIS Manager.
-
There are several ways to open the IIS Manager. Usually, we keep this pinned to the taskbar as shown below:

If not, no problem. To open IIS you click the start menu and type ‘IIS’ and the option for ‘Internet Information Services (IIS) Manager’ should appear.
Note: You can also use the Run command. For this method, you’d enter ‘inetmgr’.
-
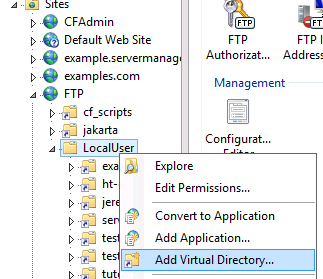
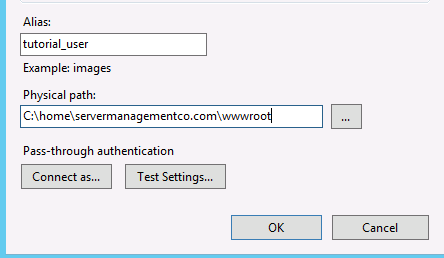
With IIS open expand the server node, then expand Sites > FTP > Local User, then right click on ‘Local User’ and choose ‘Add Virtual Directory’.
-
In the Alias field enter the name of the user you previously created. For the Physical Path enter the complete physical path that the FTP user should have access to (should be the same directory we just set the permissions on previously).
-
You should now be able to connect to the FTP user using the IP of the server, and the username and password that you just set up for this user.
As mentioned earlier in the scenario example we also wanted to lock the FTP user to only be accessible to specific IPs. We’ll cover this in the next section.
Restrict FTP User via IP Address
In the above section, we covered how to create an FTP user to any directory on the server. Let’s now cover how to lock down that FTP user to only be accessible by specific IP Addresses:
-
To restrict an FTP user to specific IPs we must first go into the settings for that FTP user. To do so open IIS again, if it’s not already open.
-
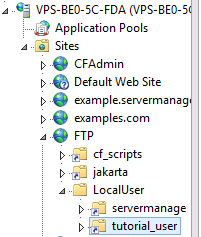
With IIS open expand the server node, then expand Sites > FTP > Local User, then click on the user in question underneath that Local Users folder.
-
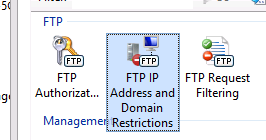
You should now see three options for FTP settings. The only one we need to focus on is ‘FTP IP Address and Domain Restrictions’, as shown in the screenshot below:
-
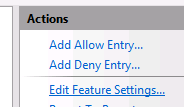
Once under this IP Restriction module, click on the ‘Edit Feature Settings…’ icon under the actions pane (on the right-hand side).
-
Now to restrict access (prevent public access to the FTP user), click the drop-down and select ‘Deny’, then click OK.

-
Now in the actions pane, click on the ‘Add Allow Entry…’.
-
You can now enter an IP Address, or IP Address range, to whitelist for the FTP user. Any IP Addresses listed in the ‘Allowed’ state will be able to connect via FTP even if public access is set to Deny.