-
If your domain is pointed to the cpanel server, you will first navigate to domain.com/cpanel. This will bring you to the cpanel login screen for your domain.
-
Next, enter your credentials and click “Log In”.
-
You will now be in your cPanel interface. Scroll down until you see the Email section and click “Email Accounts”
-
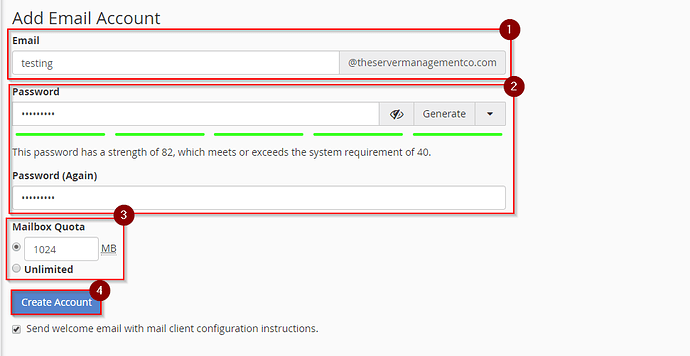
You will now be presented with a form to create a new email address.
- This field will be where you set the name for the email address. Just type the name and omit the @domain.com as this will be added automatically.
- Set the password here. Ensure that you are using a strong and secure password. If you need assistance creating the password, you can click on the generate button. Type the password again in the field below.
- Here you can set the mailbox quota for this email address. This is especially important on a cPanel VPS for managing hard drive space.
- This will create the email address.
Once the email address has been completed, and assuming the “Send welcome email….” checkbox is still checked the user will receive instruction on setting up their mail client. Your user can navigate to your domains webmail to view this.

