Subaccounts provide additional logins to the Hostek dashboard as well as the ability to give permissions to modify account settings and services.
Create Subaccount
-
Login to dashboard.hostek.com. In most cases, you will log in with the same email address and password used to log into the billing control panel (cp.hostek.com).
-
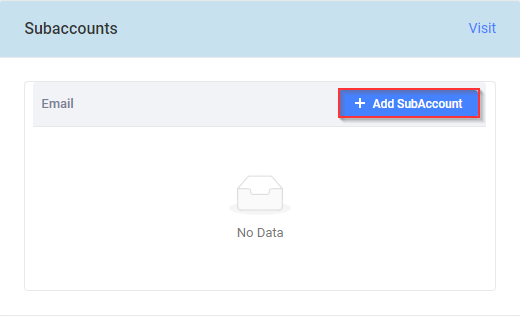
Click on "+ Add SubAccount"
-
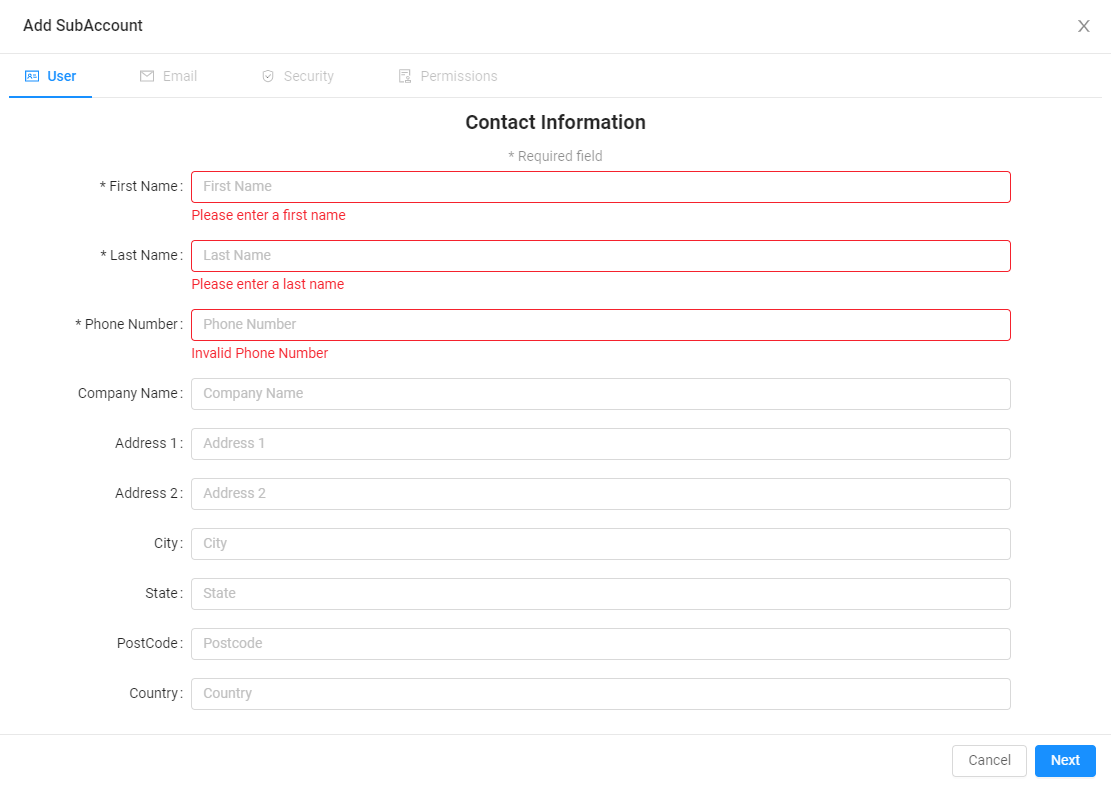
Fill in the contact information for the User you would like to add as a SubAccount. Once completed, click Next to proceed.
-
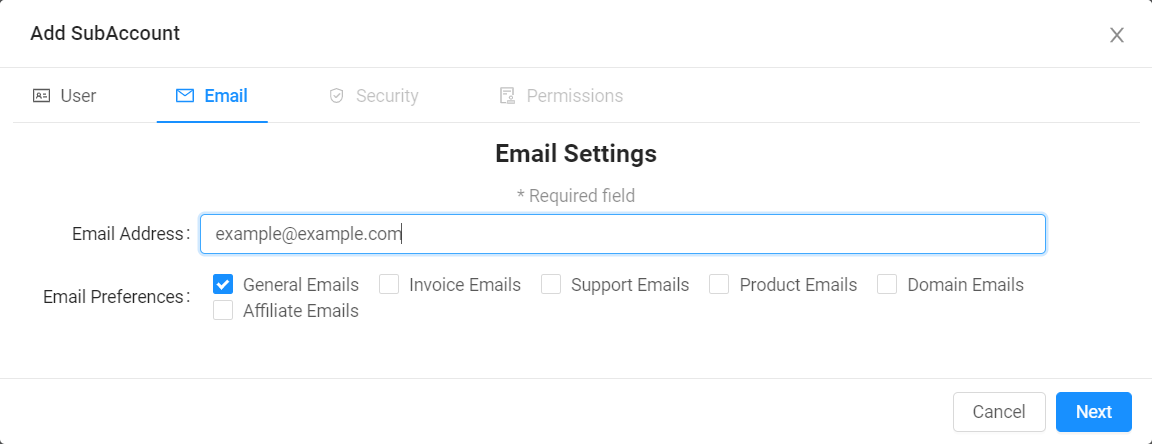
Enter the email address for the new subaccount (this will be the username for the subaccount). Additionally, the checkboxes below this indicate the emails this account will receive from Hostek in regards to your account. Click Next to proceed.
-
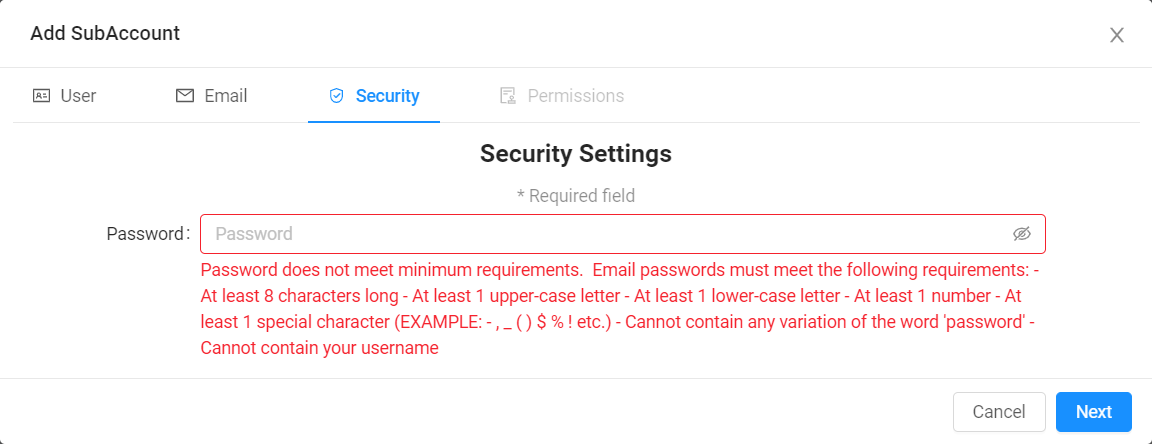
The next field will ask for the password for this user. This field requires a strong password. Click Next to proceed.
-
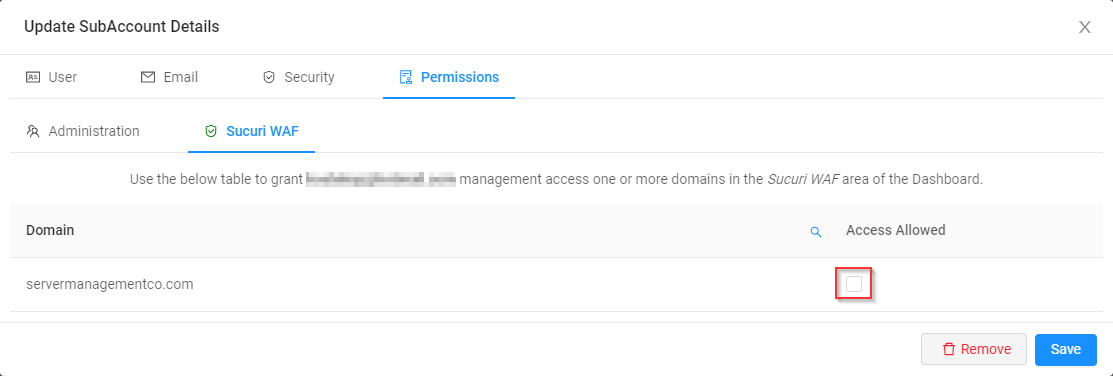
The next section allows you to set account permissions for the subaccount.
Permissions
Permissions designate what options and abilities a subaccount have to modify the settings or services of the primary account.
Permissions Descriptions
-
Account Details - This includes all of the settings nested within. These permissions provide access to products and account specific information.
-
Modify Master Account Profile - Enabling this option allows this subaccount to modify account details (email, name on the account, contact information, password, etc…)
-
Services and Products - Checking this box will enable/disable all nested items. These are permissions specific to modify, adding, or removing services and products.
-
Place new orders/upgrades/cancellations
-
View Services/Products
-
Modify Product Passwords - allow subaccount to modify certain product passwords (including their control panel).
-
-
-
Billing - Enabling this option will enable/disable all options nested within. These permissions are specific to your accounts billing, including payment type, view and pay invoices, etc…
-
Manage Invoices - View and pay invoices
-
Modify Payment Methods - Allows for the adding, modifying, and removal of payment methods for this subaccount.
-
View Account Balance - Allows this account to view the total Account Balance
-
-
Tickets - Enabling this option will enable/disable all options nested within. These permissions are specific to the subaccounts ability to create/manage tickets or view existing tickets.
-
Create/Manage Tickets - Allow/Disallow opening, responding, or closing a ticket.
-
View Account Holder Tickets - View all tickets (opened or closed) for Account Holder.
-
-

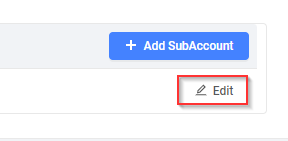
Editing a SubAccount
Once a subaccount has been created you can then edit the account from the same section.
-
To edit an existing user, click the Edit button next to the subaccount.
-
You will then be presented with the same screen that you were presented with when creating the subaccount. You can now move between the tabs freely and modify the information as needed. Once satisfied with your changes click Save
Remove a SubAccount
-
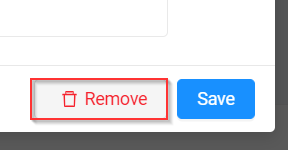
To remove a subaccount, click the Edit button next to the user.
-
At the bottom of the edit screen, click the Remove button.