When running EasyApache4 on your cPanel based server you have the capability of easily installing additional PHP versions and extensions to be used across websites on your server. In addition, EasyApache4 supports MultiPHP Manager, which allows you to have multiple versions of PHP installed on the server at the same time.
The capability of having multiple versions of PHP installed simultaneously is great, especially if you have multiple websites on the server with different PHP requirements.
This guide should walk you through choosing whether to install or uninstall specific PHP versions, as well as enabling PHP extensions within specific versions of PHP.
First, a look at the requirements for this guide:
In order to make use of the features and functionality provided within this guide you must:
- Be running EasyApache 4 (EasyApache 3 will not work).
- Have an understanding of what PHP version(s) or extension(s) you are wanting to install/uninstall.
- Have an estimated 5-10 minutes of time to perform the few steps required.
Note: If you are still running EasyApache 3 on your server, then we recommend reaching out to our team to perform the update to EasyApache 4.
We have received quite a few support cases in the past with server owners attempting their own EasyApache 3 to EasyApache 4 upgrades, which had been unsuccessful. If unsuccessful, then there is a chance of corruption and a restore needing to be performed. Again, due to the upgrade process, we recommend contacting our team to get this scheduled.
Installing multiple versions of PHP and enabling extensions:
Once you have reviewed the above-mentioned requirements, and if needed have worked with our team on getting the server upgraded
-
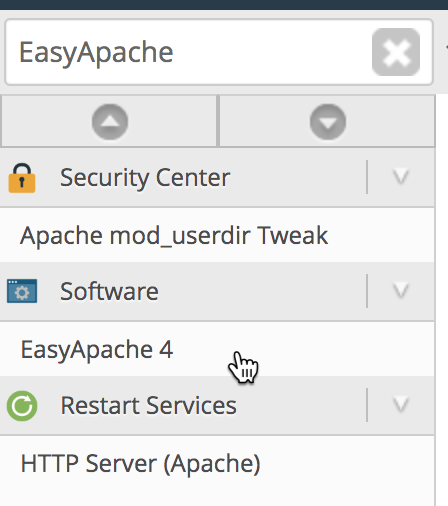
In the top-left search box in WHM, enter ‘EasyApache’ and choose the option for EasyApache 4.
-
You should now see a list of available profiles including an existing package that you have installed. A profile is essentially a package that keeps all of your existing configurations in a “bundle” so that you can revert the system to that preset package.
Although cPanel & WHM have a good number of available profiles, we recommend that you customize your own so that the server meets your specific needs.
-
Click on the button labeled Customize next to ‘Currently Installed Packages’, as shown in the screenshot below.
-
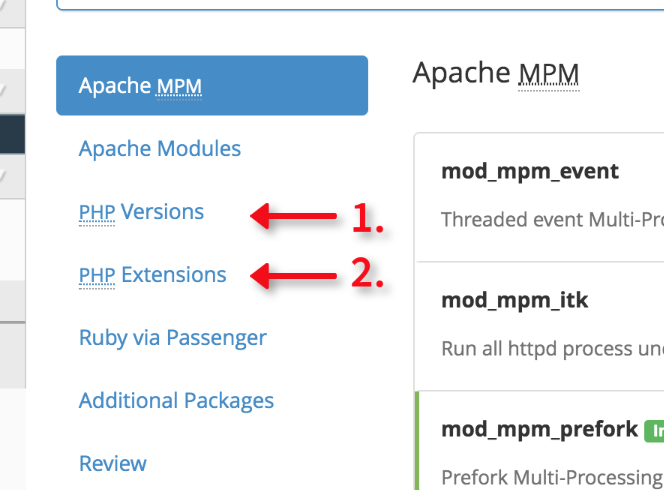
You should now see the option to toggle which features will be installed within Apache. This guide is in reference to PHP, so we will be focusing on the options for PHP Versions, then PHP Extensions.
-
You will first want to click on the option in the menu for PHP Versions, as shown in the screenshot above.
-
You should now be able to toggle which versions of PHP will be installed on the server. In the example screenshot below you will find that we already have PHP 7.2 installed and are now installing PHP 7.3.
Note: When installing new versions of PHP, as shown below, you will be asked whether you want to install the same packages (extensions) that your previous PHP versions were using. We recommend doing this to ensure that all extensions that your websites rely on are installed as they were on the previous version.
-
Once you are finished selecting the new versions of PHP, then you can click the button labeled Next.
-
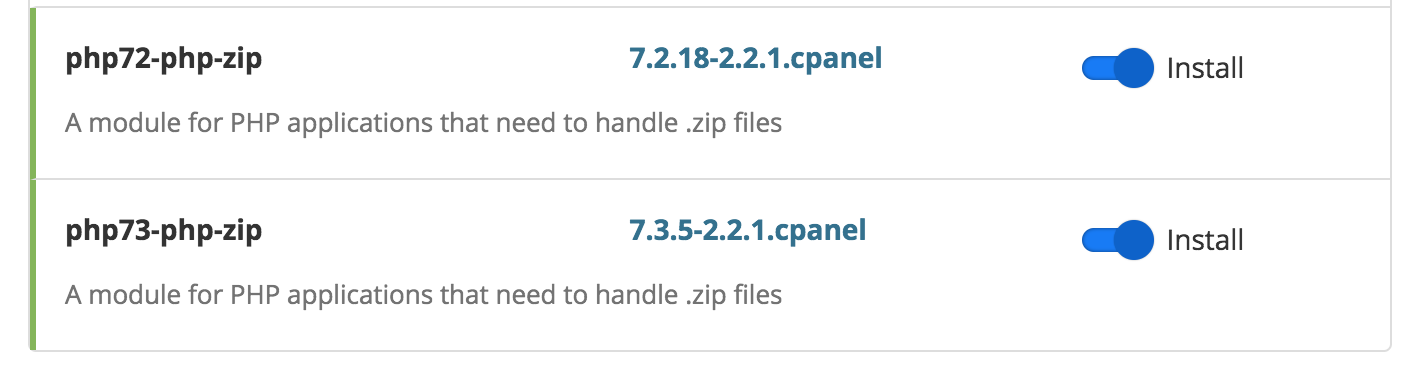
If there is any specific PHP extension that you are needing installed, then search for that extension here. You will have the option to toggle that extension per specific PHP version. For example, if you have PHP 7.2 and 7.3 enabled and perform a search for ‘zip’ then you should have the option to toggle the PHP Zip extension for both versions, as shown in the screenshot below:
-
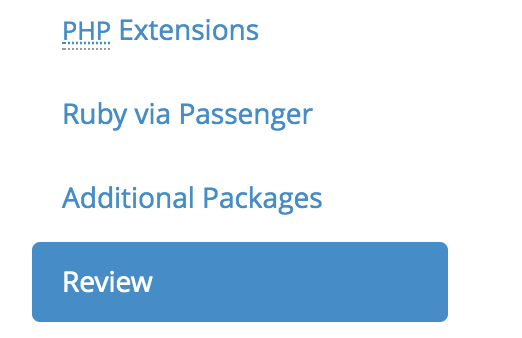
You can now click the option for Review from the left-side navigation once you are finished choosing the PHP versions and extensions to have installed on the server.
-
Review the list of changes you are about to perform, which should be presented on the page. Once confirmed that everything looks correct, then scroll to the bottom of the page and click the button labeled Provision.
-
cPanel & WHM should now be provisioning the new settings for the server and you should receive a confirmation on the screen within a few minutes. Please be sure to stay on this page until this process completes, which is normally pretty quick, as you want to make sure that the process finishes successfully.
The new versions of PHP and any new extensions you enabled should now be installed and available on the server. If you have any issues during this process please provide these details (and screenshots of any errors if possible) to our support team so we can assist in troubleshooting these issues.
You can change the version of PHP your website(s) use via the MultiPHP Manager within WHM, or within the MultiPHP Manager within cPanel (account level) if needed.