In this topic, we’ll be discussing how to manage your domain registration(s) ‘Auto-Renew’ feature.
This feature is automatically enabled for all domains after a new registration, or once a domain has been transferred to us from another registrar. Choosing to set this to ‘Disable’ will prevent the domain from automatically renewing and will let the domain expire on its expiration date.
Manage Auto-Renew
-
You will first need to login to the billing control panel: The URL to the billing control panel can be found below:
U.S. Billing Account: https://cp.hostek.com
U.K. Billing Account: https://cp.hostek.co.uk
If needed you can view the topics for logging into the billing area or recovering the password to the billing area.
-
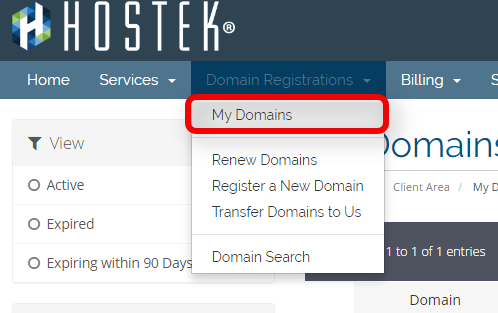
In the top-navigation menu click on ‘Domain Registrations’, then click on ‘My Domains’.
-
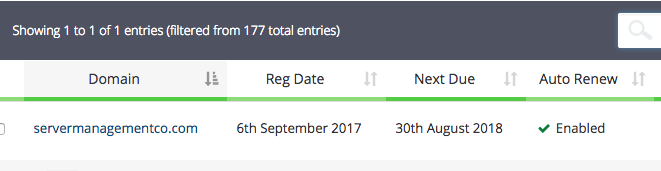
You should now see a list of your active, canceled, and expired domains that you’ve had in your account as shown in the screenshot below:
-
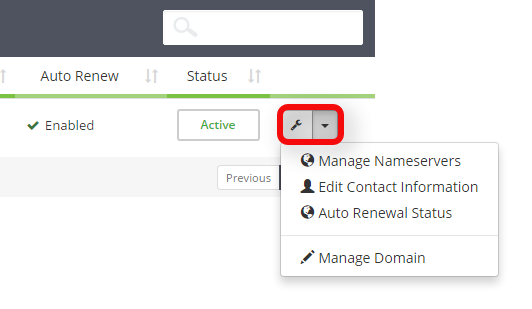
To the right of the domain you wish to manage click the wrench icon, or select the drop-down and choose ‘Manage Domain’.
Note: You can also click on ‘Auto Renewal Status’ if desired. If you do so skip to step 6.
-
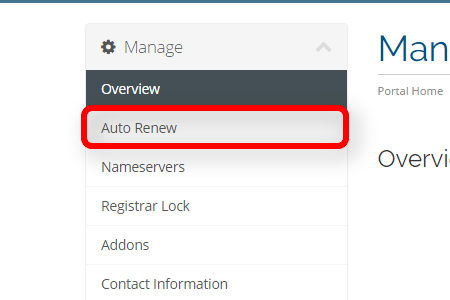
You will now be in the management portal for the domain in question. You will see a menu bar on the left side of the page with all the available options to manage for a domain. Please select the menu option for ‘Auto Renew’.
-
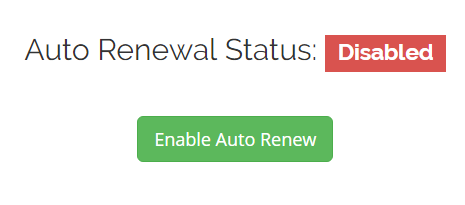
You will now see the current status of the domains auto-renew feature. We default all domains to have auto-renew turned on, however you can click on the red button labeled ‘Disable Auto Renew’ if desired as shown in the screenshot below.

-
If you ever set this feature to ‘Disabled’ then you can re-enable auto renew by clicking the green button labeled ‘Enable Auto Renew’ as shown in the screenshot below.