This topic will show how to setup and manage virtual directories via your WCP control panel.
What is a Virtual Directory?
A virtual directory is a directory alias within a website that refers traffic to another directory where the actual data is hosted. The directory it refers traffic to is a physical path on the server (or possibly another server via a network share if you have your own VPS servers).
Let’s go ahead and show how to add this to a domain hosted on our windows platform by using our custom built control panel to easily create this virtual directory. Following the below steps it may also make it clearer what this virtual directory actually is.
Add Virtual Directory via WCP
-
Login to your WCP control panel.
Note: You can view our topic on logging into WCP if you need help with this step.
-
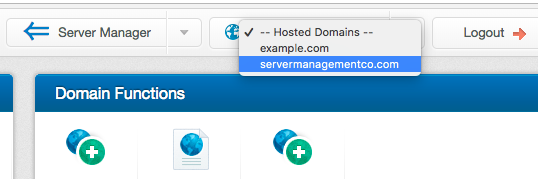
Once logged in if you are not already on the domain in questions control panel page then click on the ‘Hosted Domains’ drop-down from the top of the pages navigation bar. Then select the desired domain you wish to create a virtual directory on.
-
Once in the correct domains WCP control panel click on the ‘Virtual Directories’ icon under the ‘Files’ section.

-
If you have one or more subdomains created underneath the domain then you will get a prompt asking which domain or subdomain you’d like to manage the virtual directories for.
Click the ‘Manage’ button next to the desired domain or subdomain you’d like to manage the virtual directories for.

-
You will now see a list of existing virtual directories (if any). To add a new virtual directory click the ‘Add’ button.

-
You will then be presented with a form asking what the virtual directory name should be and what folder (physical path) it should be mapped to.
Note: You can click on the ‘Browse’ button to select a directory that already exist within your site rather than having to type it in.

-
If you need this virtual directory to also bet setup as an ‘Application Folder’ then you can check the box for this as well. In most cases, but not all, customers only need this setup as a virtual directory and not an application.

-
Review the information you’ve inserted and selected in the form and then click the ‘Save’ button once you’re ready to add the virtual directory.

Updating Existing Virtual Directory
The above steps show how to get to and add a virtual directory. If you need to edit or delete an existing virtual directory we’ll show you how below.
-
Click the pencil icon next to the desired existing virtual directory as shown in the screenshot below:

-
You will then be able to update the physical directory that virtual directory pulls from.
Note: You cannot update the actual virtual directory name itself. You’ll have to delete the virtual directory and create a new one if it needs setup with a new name.

Delete existing virtual directory
Let’s show how to delete an existing virtual directory.
-
Click the trash can icon next to the virtual directory you wish to remove as shown in the screenshot below:

-
You’ll then be presented with a confirmation pop-up asking if you’re sure that you want to delete this virtual directory as shown in the screenshot below. Click ‘OK’ to confirm the deletion or click ‘Cancel’ to cancel the removal of the virtual directory.
