This topic will show how to set up a new e-mail user within the Outlook e-mail client. You can view the video posted below, or you can scroll down and read a step by step instruction guide:
Adding e-mail account to Outlook:
Below are the steps needed to connect your e-mail account to Outlook:-
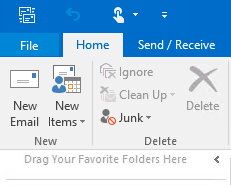
Open the Outlook Account Settings dialog. To do this in Outlook 2016 click on the ‘File’ menu option.
-
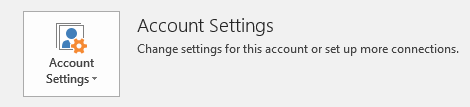
Then select the ‘Account Settings’ drop-down and select ‘Account Settings’ once more.
-
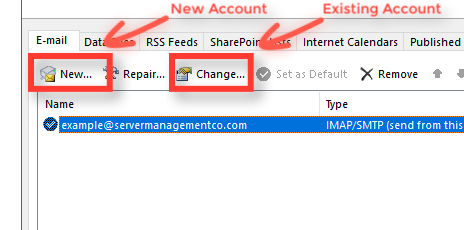
You will now see a list of any e-mail users you already have created within your outlook account (if any). Here you can click on ‘New…’ to start creating a new account.
Note: If you are needing to modify an existing account, then click on ‘Change…’.
-
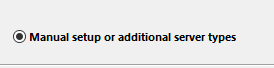
If you are only modifying an existing user, then skip to step 5. If creating a new user, then you should now select ‘Manual Setup or Additional Setup Types’. Then click Next.
-
Now choose the option for ‘POP or IMAP’. Then click Next.
-
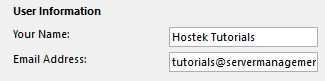
Enter in the User Information fields, including the Display Name and the full Email Address.
-
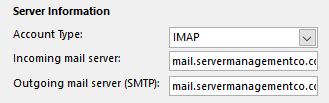
Next enter in the Server Information fields, including the account type (IMAP or POP), as well as the server hostname for both incoming and outgoing settings.
It is very important to select the proper account type and the correct server hosts names. IMAP will mirror existing e-mails on the server, while POP will by default download emails off of the server (deletes emails from the actual server). We recommend using IMAP if you are unfamiliar with the differences, especially if you plan on connecting with several different devices to your email account.
Server Hostname : If you have ‘mail.yourdomain.com’ pointing to the IP Address of the server your mail is hosted on then you can use this as the hostname. If you do not have a domain pointing to the IP of the server hosting your mail then you can use the pre-propagation webmail address that is provided in either your account information email or in the control panel for the domain.
-
On our windows servers you can find this in the control panel under ‘WebMail’. This webmail address usually looks something similar to ‘ mail12.ezhostingserver.com ’.
-
On our shared Linux servers you can find this in the control panel (cPanel > Email Accounts > Set Up Mail Client). This will be listed under the Manual Settings section. This hostname usually looks something similar to ‘ cp20.hostek.com ’.
Note: On our Linux VPS servers we do not have a pre-propagation URL setup by default so you’ll need to have a fully qualified domain name (FQDN) setup and pointing to the servers IP Address.
-
-
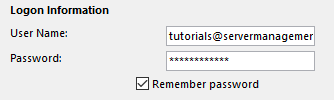
Next enter in the Login Credentials fields, including the full Email Address and Password. This will be the username and password of the e-mail user you are authenticating as on the e-mail server.
Make sure that the Remeber password box is checked.
-
Now click on the ‘More Settings…’ button towards the bottom-left of the dialog box.
-
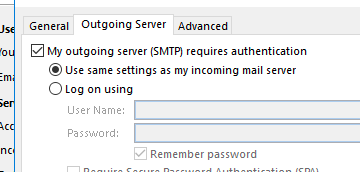
In the ‘Outgoing Server’ tab make sure that the options for My outgoing server (SMTP) requires authentication is checked, along with Use same settings as my incoming mail server.
Note: It is very important that these settings are enabled, otherwise your mail server will fail to send e-mails on the behalf of your e-mail client as our servers require SMTP authentication.
-
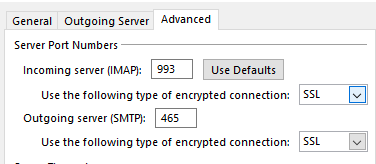
Now click on the tab for Advanced. You will need to specify the correct ports and TLS/SSL settings here in order to make successful connections to the mail server (Using the hostname you specified earlier in the settings).
For businesses, we always recommend using SSL for e-mail. This does require a valid SSL certificate to be installed on the mail hostname that you’re connecting with. If you do not have an SSL setup for your domains mail hostname (generally something like mail.your-domain.com), then view our SSL options.
Once you have a valid SSL installed and configured (our team can assist with proper configuration), then you can use the following settings:
SSL Settings:
Incoming Server (IMAP) Port: 993
Incoming Server (POP) Port: 995
SSL: Yes, enable the SSL via drop-down.Outgoing Server (SMTP) Port: 465
SSL: Yes, enable the SSL via drop-down.Note: You will only see IMAP or POP if that is the protocol you selected earlier. We recommend using IMAP for most e-mail applications.
If you are not using an SSL certificate, then in most cases you do not need to change any settings in the Advanced Tab. We will still provide the settings to use below for reference:
Non-SSL Settings:
Incoming Server (IMAP) Port: 143
Incoming Server (POP) Port: 110
SSL: No, set this to None.Outgoing Server (SMTP) Port: 587
Alternative SMTP Port: 25 or 26 (most ISPs block port 25)
SSL: No, set this to None.Note: You will only see IMAP or POP if that is the protocol you selected earlier. We recommend using IMAP for most e-mail applications.
-
Once you set the correct ports to connect to your mail server, then press the OK button.
-
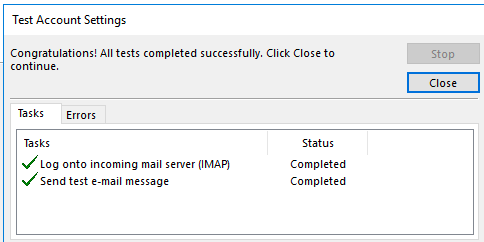
Ensure the rest of your settings are correct from the above guidelines, then click the Next button. This will fire off a test that will check if the outgoing (SMTP) and incoming connections.
If successful, then you should see the Completed status to the right of both performed test.
-
If the status is Failed, then re-check your settings and ensure that you are using the correct hostname and ports that are available on your mail server in order to connect.
Congratulations, your email should now be connected with your Outlook!