Using Web Deploy
Web Deploy is a Microsoft tool that simplifies the deployment and synchronization of web applications and websites to IIS web servers. This tool allows you to synchronize the site configuration, content, and certificates from one instance to the next. Do keep in mind that your development/host machine may differ in certain respects so there can be some configuration differences after a deployment, but if the configuration requirements of the application are site specific then the application will deploy with relative ease.
Enabling Web Deploy
In order to use Web Deploy, you must enable it for one of your FTP users. You will then use that FTP user’s credentials to authenticate when publishing with Web Deploy.
To enable an FTP user for Web Deploy please follow the steps below:
-
Log in to your WCP Control Panel.
-
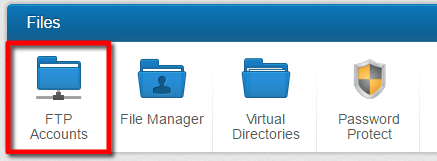
Next, navigate to your ‘FTP Accounts’ button.

-
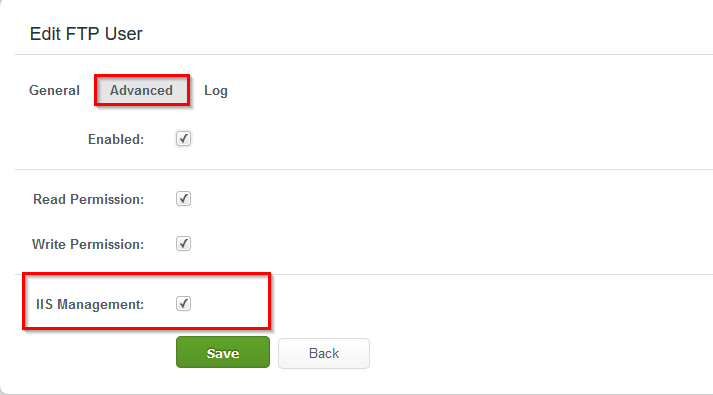
Select the ‘Advanced’ tab, and check the ‘IIS Management’ checkbox.
Now that you have an FTP user ready for Web Deploy. You can use the following settings to connect to the site:
-
Server: secure##.ezhostingserver.com
(The above is available in the ‘Site Details’ section in the control panel.) -
User name: ** your FTP username **
-
Password: ** your FTP password **
-
Site name:
domainname.com
(Replacedomainname.comwith your actual domain - do not include the ‘www’ on the domain name. If you are publishing to a sub-folder, add the sub-folder name to the end of the ‘Site name’. Do not end with a trailing forward slash.) -
Destination URL:
http://www.domainname.com
(This will be the URL of the location to which you are publishing. If your domain name is not pointing to the site yet, use the full pre-propagation URL listed in the ‘Site Details’ section. If you are publishing to a sub-folder, add the sub-folder name to the end of the URL. Do not end the URL in a forward slash.)
