SmarterMail: Events
Within the SmarterMail environment, “Admin” level users can generate Events that can be triggered based on preset conditions. There are two kinds of actions that can be processed in relation to a triggered condition, “send an email” or “send a notification.” You can think of events as a very low-level algorithm: If x condition is met, process y action
To create a new Event, please follow the steps below:
-
Log in to an “Admin” level user.
-
Next, navigate to the “Domain Settings” icon, select it, and then select the category “Events” on the left side.

-
Select the blue “New” button.
-
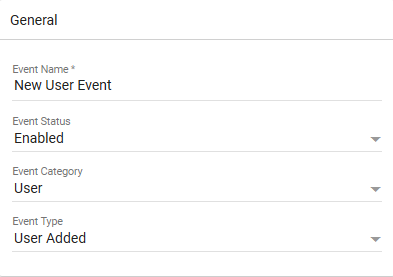
Now, you will need to name the event, select the category, and the type of event.
- Event Categories
- User
- Mailing List
- Alias
- Throttling
- Collaboration
- Event types will change based on the category that you select.
- Event Categories
-
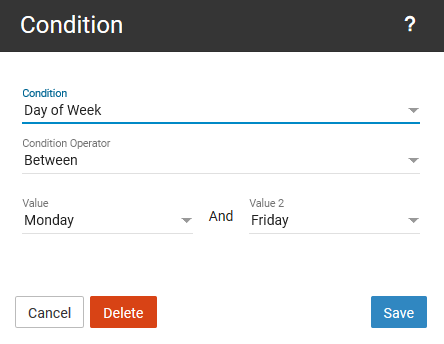
Once you have configured the category and type of event, You will need to set up the condition.
-
With the condition configured, you will now need to decide what kind of action you desire.
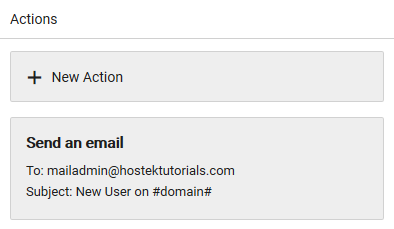

As an example, the screenshots indicate that we have created an Event that will send an email to [email protected] if a user is created for the hostektutorials.com domain between Monday and Friday.
Note: You can still edit an event after it has been created by selecting it from the "Events List."