The ‘Service Group’ function allows you to customize templates for services assigned to newly created domains added to your VPS/Reseller.
Service Groups
-
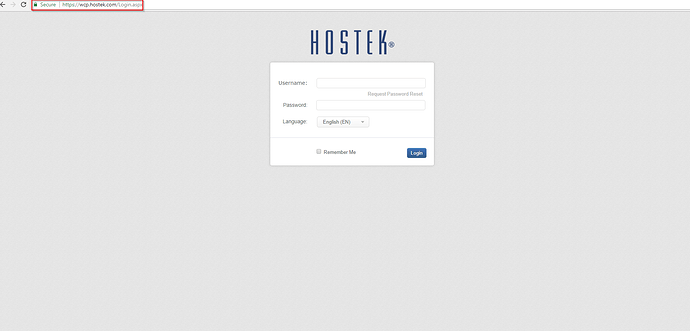
Login to your WCP Control Panel
Note: You can view our topic on logging into WCP if you need help with this step.
-
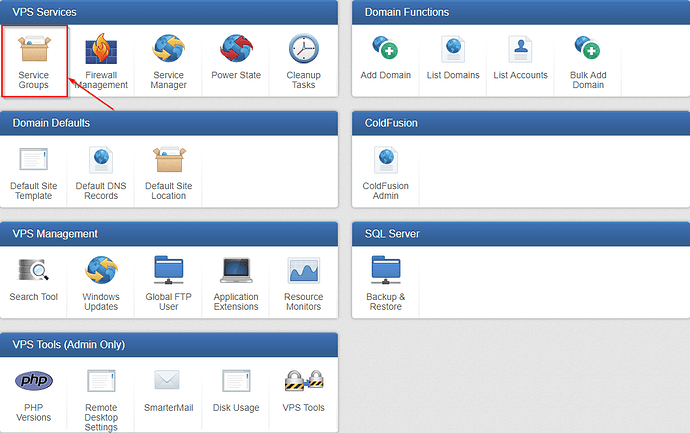
You will then be brought to the Server Manager screen. Click on ‘Service Groups’.
Note: If you are logged in but not on this Server Manage page then click the drop-down on the top-right of the page and choose ‘Server Manager’.
-
You will then be presented with your current packages along with the ability to create a new package.
Adding a Service Group
-
From the Service Group box, click the Add button.
-
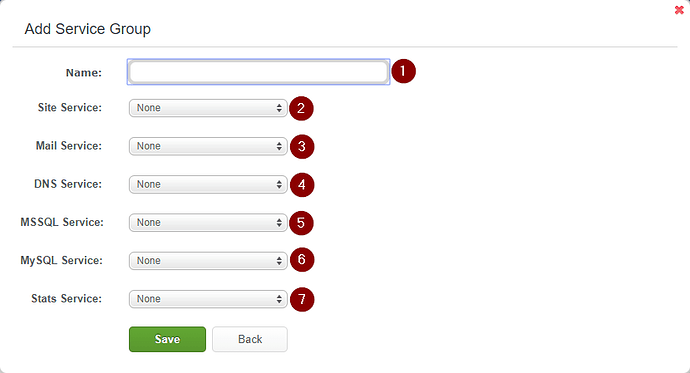
You will now be presented with the ‘Add Service Group’ window. This window will allow you to specify which services will be available with this package. And if you have multiple servers (dedicated to individual services) you can manage which servers are assigned to specific services.
- ’Name’ - This will be the name of the Service Group.
- ’Site Service’ - Specify what server will handle Site IIS Services. If this group will not be using site services (for example: Mail only domains) set this field to 'None’
- ’Mail Service’ - Specify what server will handle Mail services. If this group will not be using mail services on your server then set this field to 'None’
- ’DNS Service’ - Specify if you would like to use the whitelabled nameservers (.ezhostingserver.com) or Hostek branded nameservers (.hostek.com). If domains in this group have DNS managed elsewhere you can set this to ‘None’.
- ’MSSQL Service’ - Specify what server will handle MSSQL services for this group. If domains in this group will not be utilizing MSSQL databases you can set this to ‘None’.
- ’MySQL Service’ - Specify what server will handle MySQL services for this group. If domains in this group will not be utilizing MySQL databases you can set this to ‘None’.
-
’Stats Service’ - If you have the Smarterstats addon for your vps/vps’s you can assign this field to the server it is installed on for domains in this group. If not using SmarterStats you can set this to ‘None’.
-
Once you have completed editing the group. Click ‘Save’.
Edit an Existing Service Group
- From the Service Group box, click the ‘Pencil’ icon to the left of the group name you would like to edit.
- You will then be presented with the current settings for the group you have selected. Modify the settings as needed.
- Once you have completed modifications to the group, click the ‘Save’ button.
Delete an Existing Service Group
From the Service Group box, click the ‘Trashcan’ icon to the right of the group name you would like to delete.
Note: Any domains currently assigned to this group will need to be assigned to a new Service Group before a Group can be deleted. An error will present itself if a domain is still using this group and prevent deletion.


