Upgrading WordPress Manually
Sometimes you might find that upgrading your WordPress instance manually to be the more efficient or safer route than relying on the automated process. For those times, please follow the steps below to upgrade your WordPress site.
-
Since this is a manual upgrade, you will need to retrieve the latest version of the WordPress application. To do so navigate to the following link:
-
Next, extract the .zip file you had just downloaded. I recommend placing the files into their own unique directory to simplify the process.
-
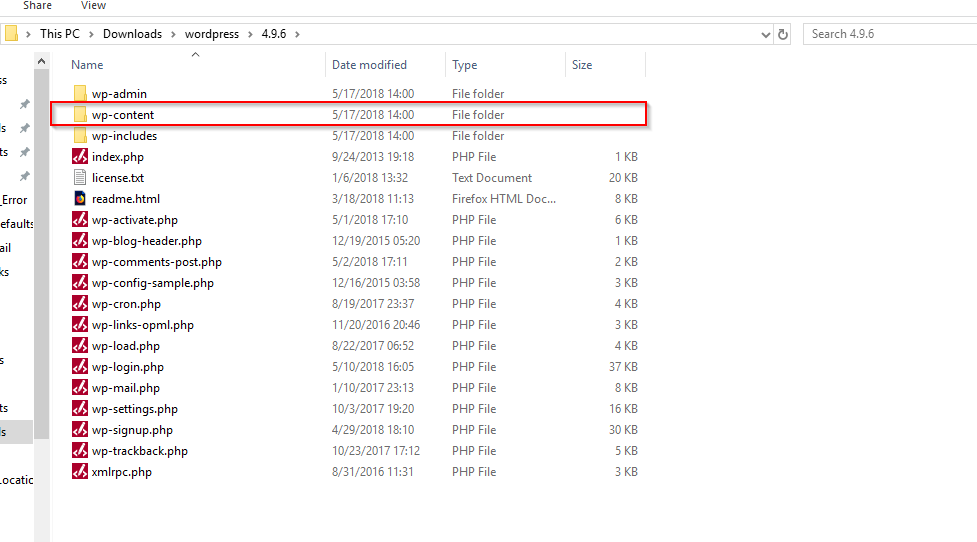
Then locate the ‘wp-content’ directory in the folder you have just unzipped. Go ahead and remove this directory. It will not contain any necessary files for the new version and removing it will prevent you from accidentally overwriting your existing ‘wp-content’ which will contain your images, plugins, and theme content.
-
Now access your WordPress root directory using FTP. Below are links for how to manage your FTP accounts in the two control panels that we work with.
-
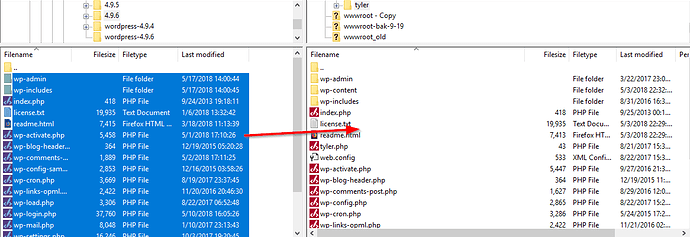
Now in your FTP Application browse to the location you extracted your WordPress files and move these over to the same root directory that you have WordPress currently installed.
Note: You will need to overwrite all of the pre-existing WordPress files (besides the wp-config.php file and the wp-content directory, as these two are unique to your site); otherwise, you could end up in a situation with a partial upgrade.
-
Once the FTP Transfer is complete your WordPress installation should be upgraded to the latest version. We recommend logging into your WordPress Dashboard to ensure it shows that you’re upgraded to the latest version.
Note: The next time you log in to your WordPress Dashboard you might get a notice that WordPress has been updated and that you need to update the Database to continue to your dashboard. In this case, just click the button for ‘Update WordPress Database’ and it’ll automatically update.

