The ‘Add Domain’ function allows for you to add a domain to a customer within WCP to be hosted on your VPS, or under your reseller’s package.
Add Domain
-
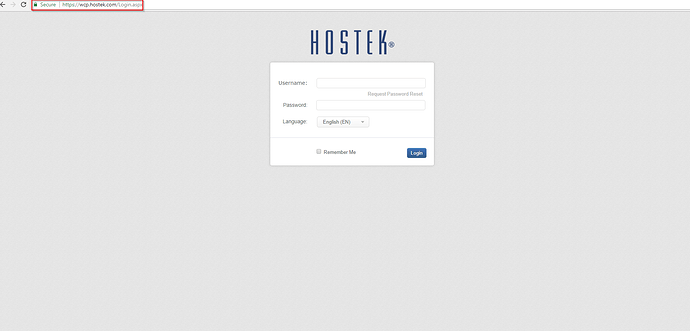
Login to your WCP Control Panel
Note: You can view our topic on logging into WCP if you need help with this step.
-
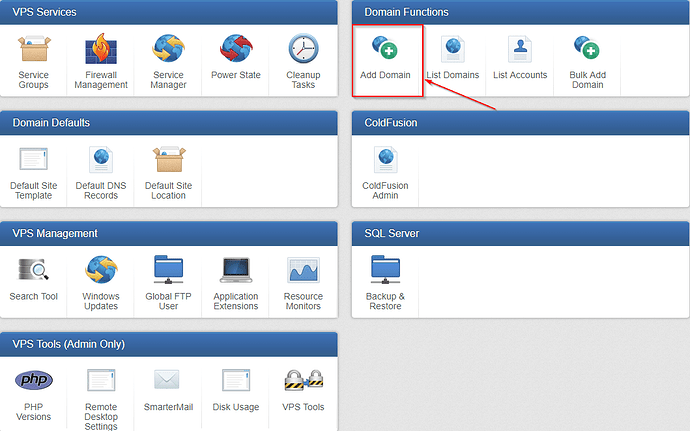
You will then be brought to the Server Manager screen. Click on ‘Add Domain’.
Note: If you are logged in but not on this Server Manage page then click the drop-down on the top-right of the page and choose ‘Server Manager’.
- The Add Domain window will appear with a drop down to select the customer that this domain will be added under. Once you have selected the customer to which you would like to add the domain for, click next.
Basic Setup for Adding a Domain
-
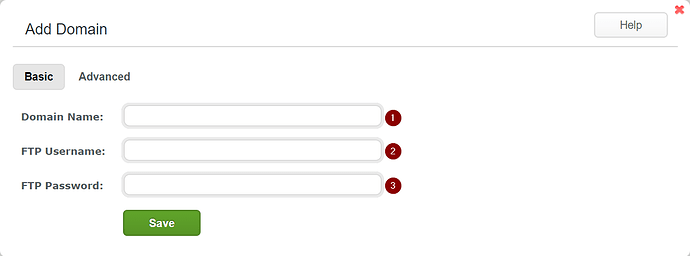
Domain Name: Enter the Domain name that is to be created in the first field.
-
FTP Username: Enter the username for the default FTP user that will be created with the domain.
-
FTP Password: Enter the password for the default FTP user that will be created with this domain.
-
Save: Finally, click save. This domain is now created under the customer that was specified in the previous section.
Advanced Setup for Adding a Domain
-
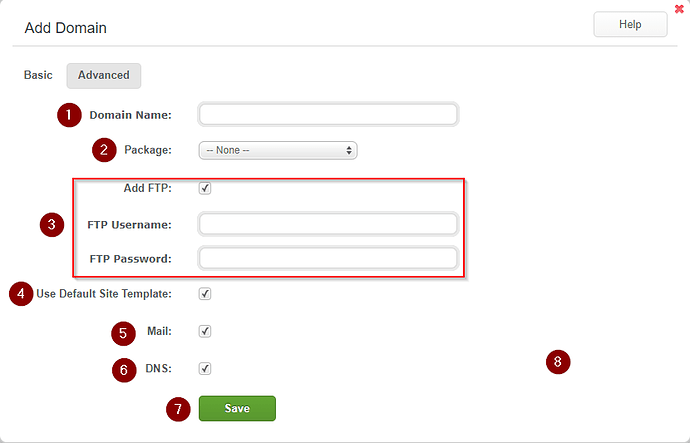
Domain Name: Enter the Domain name that is to be created in the first field.
-
Package: You can specify a package for this domain. Packages are created within the account manager section of WCP.
-
Add FTP: Select whether you would like to ‘Add FTP’ user at this time. If checked enter the FTP username and FTP password in the fields below. If unchecked move to the next step.
-
Use Default Site Template: Select whether you would like to use the ‘Default Site Template’. You can learn about the ‘Default Site Template’ here.
-
Mail: Select whether this domain will have ‘Mail’ enabled.
-
DNS: Select whether this domain’s ‘DNS’ record functions will be available.
-
Save: Once satisfied with the settings for this domain click the ‘Save’ button. This will then create a domain under the customer specified in the first section of this Post.


