The packages section allows you to create hosting templates for the domains created on your VPS or Reseller account. You can access this via your Account Manager settings within the WCP control panel.
To Create or Modify Package Settings
-
Login to your WCP Control Panel
Note: You can view our topic on logging into WCP if you need help with this step.
-
You will then be brought to the Account Manager screen. Click on ‘Packages’.
Note: If you are logged in but not on this Account Manage page then click the drop-down on the top-right of the page and choose ‘Account Manager’.

-
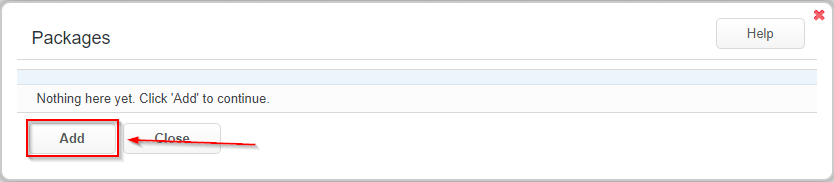
Next, you will be presented with a list of existing packages. If you are looking to edit a package skip to step 6. To create a new package click on the ‘Add’ button.
-
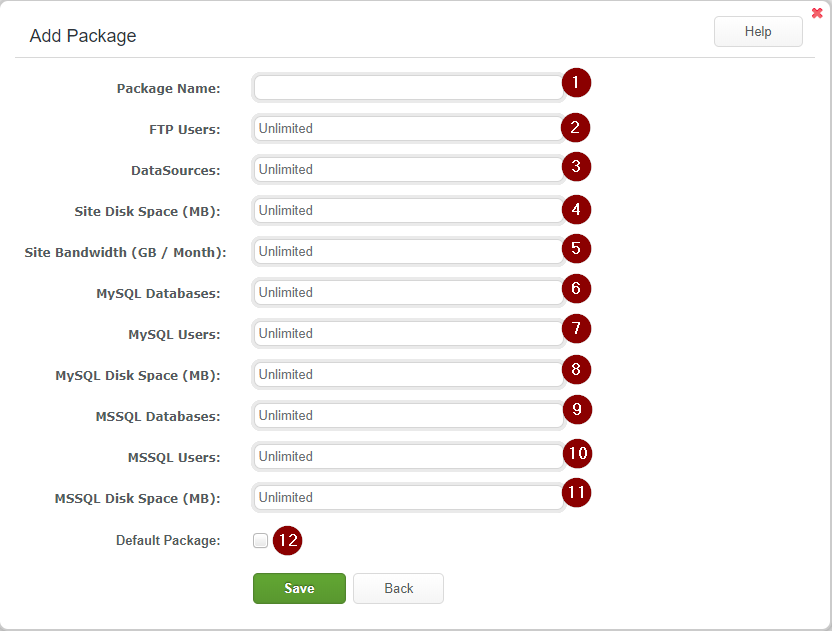
Next, you will be able to customize the limits of each package.
Note: The following settings are per user.- Package Name - This will be the friendly name for your custom package.
- FTP Users - Number of ftp users this package allows
- Datasources - Number of datasources this package allows
- Site Disk Space - The amount of disk space available this package allows
- Site Bandwidth (GB / Month) - The amount of bandwidth that is allowed per month
- MySQL Databases - The amount of MySQL databases that are allowed to be created by this package
- MySQL Users - The amount of MySQL users allowed to be created for this account
- MySQL Disk Space (MB) - The amount of space allowed Per Database
- MSSQL Databases - The amount of MSSQL databases that are allowed to be created by this package
- MSSQL Users - The amount of MSSQL users allowed to be created for this account
- MSSQL Disk Space (MB) - The amount of space allowed Per Database
- Default Package - If checked this will be the default package created if no other package is selected.
-
Once all the fields are set as you would like, click the ‘Save’ button.
-
To edit an existing package, click the pencil icon just to the left of the package name.
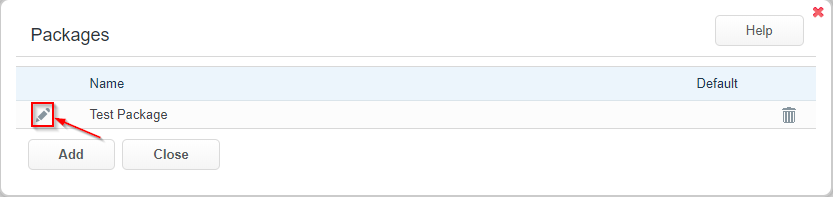
- You will now be able to edit the package. Once finished click ‘Save’.