SmarterMail: Disable Greylisting
SmarterMail by default will enable a protective process called “Greylisting” to delay first-time senders to a domain on the server. This is designed to determine if this first-time sender will be abusive and attempt to spam the domain user on the SmarterMail server.
This feature essentially bounces all unknown messages back to the sending server. All legitimate sending mail servers will then re-send the message in 15 minutes or less generally. This slight delay is only for the first email from the sender. On their next email to you, as long as it’s from the same origin IP as the last e-mail that was greylisted, it will be delivered without the delay.
Some e-mail host (such as @gmail.com, @yahoo.com, @aol.com, etc.) that have many different potential sending servers will often have greylisting occur more than once for the same sender address… and in some cases will keep bouncing the same message back to the sender. This is due to the IP Address of the sending server consistently changing so the server that GreyListing is occurring for does not know about this new IP Address connecting and ultimately bounces the message back. In some cases, it may take 2-3 times for the sender to finally get the e-mail through to the destination address… once it finally sends from the same iP Address it has sent from previously.
Note: Trusted Senders will automatically bypass Greylisting and are delivered directly to the Spool.
While this does have benefits, we often see that our clients are confused as to why when a user is created or migrated that messages sent to that user can sometimes take a long time to be received. More often than not the message was not rejected by the server, but instead greylisted. Greylisted messages will eventually reach their intended recipients once the sender resends the e-mail from the same source IP Address as the last attempt. The messages are not discarded unless the first time sender cannot be validated as a legitimate sender.
If you would rather implement different security features and favor having a fast initial reception, you can choose to disable this feature.
Note: If you are in a Shared environment you will not have access to disable this setting, as only server administrators can disable it. If on a shared mail server request this feature to be disabled on your behalf by our support team while also providing security verification so our team can process your request.
To disable Greylisting on a domain, please follow the steps below:
-
Log in as the "Server Administrator."
-
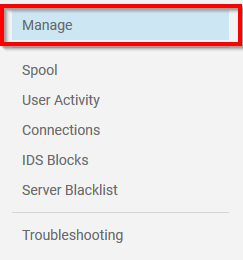
Next, access the Domain Manager, indicated by the “Manage” category on the left side.

-
Now, select the desired domain.
-
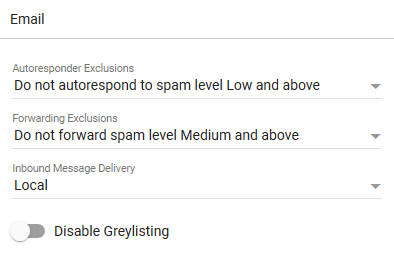
Once you have accessed the domain, locate the “Email” section.

-
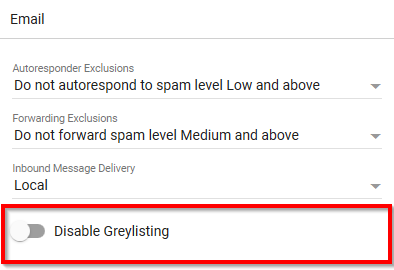
You will see a toggle for an option labeled “Disable Greylisting”. Select the toggle to enable or disable the feature.

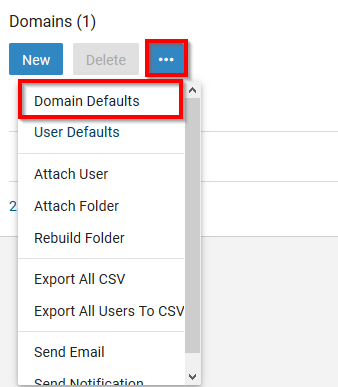
If you would like to have the Greylisting option disabled as a default value, you can do so by editing the “Domain Defaults.”
To implement this change, follow steps 1 & 2 but instead of selecting the domain. Select the “…” button and then click the “Domain Defaults” option, as indicated by the screenshot below. Now you can follow steps 4 & 5, and use the toggle to disable the Greylisting feature for all future domains on the server.
