Managing Domain Defaults
Properly managing the domain defaults, can take a lot of legwork out implementing new domains to your SmarterMail instance. With these default configured correctly, your domain administrators will have a good template with which to further administer the user accounts.
In this article, we will discuss how to access the Domain Defaults options and what the individual options in the sections can do for your domains.
Accessing The Domain Defaults
To modify your domain defaults, please follow the steps below:
-
Login to your Server Administrator user.
-
In the Manage category, where the domains are listed, locate and select the blue ‘…’ button. This button will present a drop-down menu where you can then select the 'Domain Defaults’
Note: You can also influence the User Defaults through this interface.
-
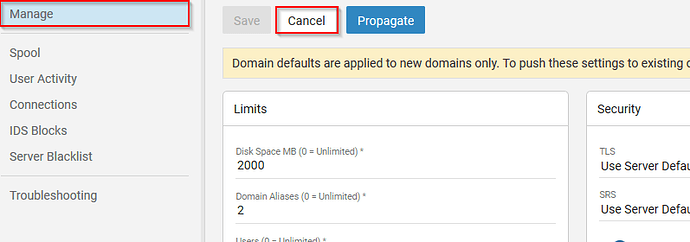
After selecting the ‘Domain Defaults’ button you will be loaded into the available options. You can exit this window, without saving, by selecting the ‘Cancel’ button or the ‘Manage’ category option to the left.
Editing The Domain Defaults
Once you have accessed the Domain Defaults page you will be able to make the desired changes. In this section, we are going to break down what these options can do for your domains.
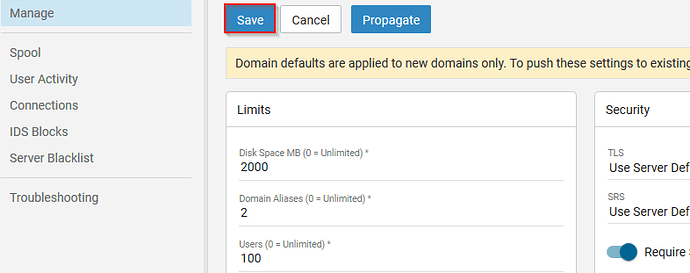
To implement the changes for newly created domains, going forward, select the blue ‘Save’ button as illustrated above:
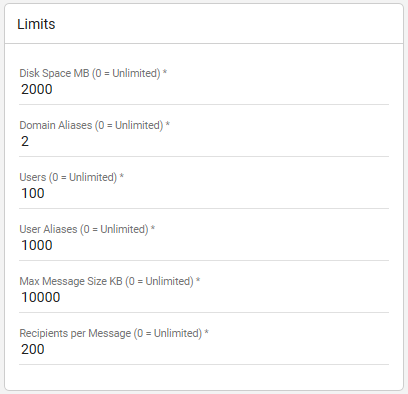
Limits
-
Disk space MB: This value will restrict the amount of space allocated to the Email Domain.
-
Domain Aliases: This value will determine how many domain aliases a domain administrator can generate.
-
Users: This value restricts the number of users per domain.
-
User Aliases: This value will determine how many user aliases users can generate.
-
Max Message Size: This value limits how big a single message is allowed to be before stopping that message from exiting the system.
-
Recipients per Message: This value restricts the number of users that can receive a copy of a single attempt. Think CC’s and BCC’s.
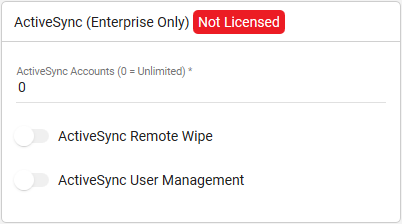
ActiveSync
-
ActiveSync accounts: This value limits the number of Microsoft Exchange ActiveSync accounts that can be assigned to a single domain.
-
ActiveSync Remote Wipe: When this option is enabled users will be able to wipe content from a remote instance.
-
ActiveSync User Management: Enable this option to allow Domain Administrators to assign their allotted Exchange ActiveSync mailboxes to users on their domain.
-
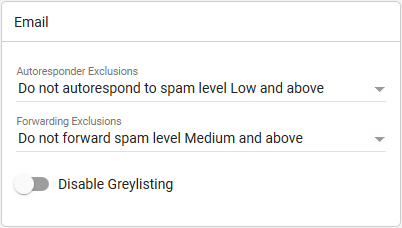
Autoresponder Exclusions: To prevent SmarterMail from sending automated messages, such as out-of-office replies, to addresses based on the spam level of the original message, select the appropriate option from the list.
-
Forwarding Exclusions: To prevent the system from forwarding messages based on the spam level of the message, select the appropriate option from the list.
-
Disable Greylisting: Enable this option to disable the greylisting antispam check for the domain. For more information regarding Greylisting click here.
Mailing Lists
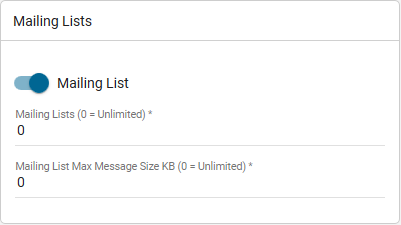
-
Mailing List: enable this option to allow domains to create and manage mailing lists. More information on that topic can be found here.
-
Mailing List (Limit): This value will determine how many mailing lists will be allowed per domain.
-
Mailing List Max Message Size (KB): This value will restrict how large the email message can be on the mailing list.
Security
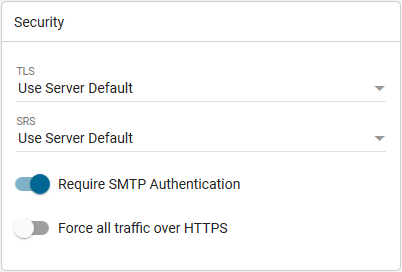
-
TLS: To enable or disable TLS (SSL encryption) for outgoing mail, select the appropriate option from the list.
-
SRS: To enable or disable SRS (the ability for the mail server to re-write the sender’s email address so that forwarded messages pass SPF checks) for mail, select the appropriate option from the list.
-
Require SMTP Authentication: Enable this option to require SMTP authentication when sending email messages. Note: If this option is enabled, users must provide an email address and password to send email from their account. SmarterMail supports cram-md5 and login authentication methods.
-
Force all traffic over HTTPS: Select this option to force all SmarterTrack traffic over HTTPS. This improves SmarterMail security by allowing all traffic to be encrypted. Note: Prior to enabling this setting, SmarterMail must be set up as a site in IIS and have a valid SSL certificate in place for the SmarterMail site. If this is enabled and a user navigates to the IP address, the server will attempt a rDNS lookup and then redirect accordingly.
Miscellaneous
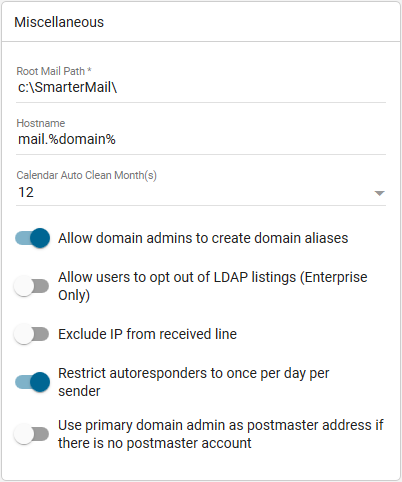
-
Root Mail Path: Input the path to the SmarterMail installation based on the SmarterMail server application root. This, by default, will be *c:\SmarterMail*
-
Hostname: This setting controls the value for “hostname” when called by the domain accounts in the smartermail. As an example, this can be used for email clients. The default for this value is mail.%domain%. Where %domain% will be replaced by the domain name of the new domain account.
-
Allow domain admins to create domain aliases: Enable this option to allow Domain Administrators to create domain aliases. A domain alias is basically an alternate domain name for one that already exists in SmarterMail. For example, imagine you have a domain, ‘
example.com’, in SmarterMail with a user, ‘[email protected]’. By adding a domain alias for ‘example.net’, emails sent to ‘[email protected]’ will be delivered to ‘[email protected]’. That means that emails sent to either domain will end up in the same mailbox. -
Allow users to opt out of LDAP listings: Select this option to allow users to remove themselves from the Global Address List. Note: This feature is only available when licensed with SmarterMail Enterprise.
-
Exclude IP from received line: Select this option to remove the client’s IP address from the received header on messages received through SMTP. Note: Removing the IP address from the received header is not recommended because it violates RFC.
-
Restrict autoresponders to once per day per sender: Select this option to limit how frequently an autoresponder is sent. Continually sending something like an out-of-office reply to the same address every time an email comes in can cause abuse issues. Therefore, it is recommended that this is set for all domains.
-
Use primary domain admin as postmaster address if there is no postmaster account: Select this option to use the primary domain administrator as postmaster address if there is no postmaster account configured for the domain. Note: The postmaster address for the server can be configured in the General Settings section.
Priority & Throttling
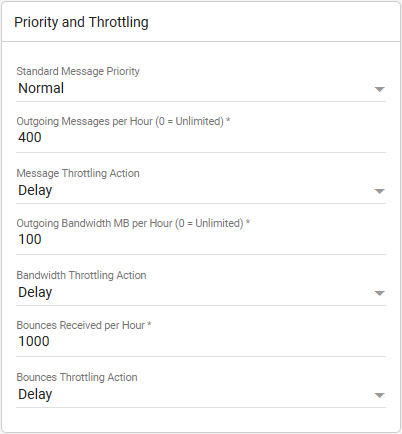
-
Standard Message Priority: The priority level for messages that don’t have another priority affecting it.
-
Outgoing Messages per Hour: The number of messages sent by the domain per hour. By default, the number of outgoing messages is 5,000.
-
Message Throttling Action: The action SmarterMail should take when the message throttling threshold is reached.
-
Outgoing Bandwidth per Hour (MB): The total number of MBs sent by the domain per hour. By default, the outgoing bandwidth is 100.
-
Bandwidth Throttling Action: The action SmarterMail should take when the bandwidth throttling threshold is reached.
-
Bounces Received per Hour: As bounce messages are received from null senders per RFCs, this setting dictates the number of messages from null senders a domain can receive over SMTP before any further messages from null senders will be rejected. By default, a domain can receive 1,000 bounces per hour.
-
Bounces Throttling Action: The action SmarterMail should take when the bounces throttling threshold is reached.
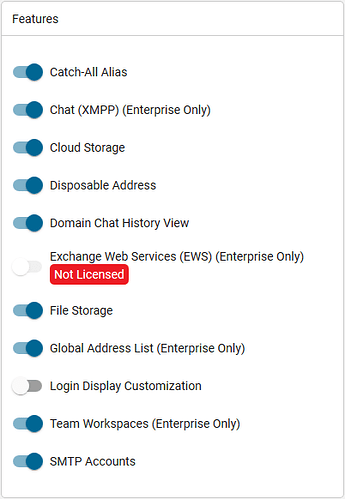
Features
-
Active Directory Integration: Select this option to enable active directory authentication. By enabling this, domain administrators will be able to add in the necessary LDAP binding string to import LDAP users. Note: This feature is only available when licensed with SmarterMail Enterprise.
-
Catch-All Alias: Select this option to allow Domain Administrators to create catch-all email addresses. A catch-all alias is an email address that receives all incoming email that goes to invalid email addresses within the domain.
-
Chat (XMPP): Select this option to allow users on the domain to chat with each other via the Web interface or any XMPP-compatible chat client. Note: This feature is only available when licensed with SmarterMail Enterprise.
-
Connected Services: Select this option to allow users to connect different services to their SmarterMail accounts to facilitate actions like attaching links to shared files.
Disposable Addresses - Select this option to allow users to create a temporary, disposable address independent of their email address. -
Domain Chat History View: Select this option to allow domain administrators to be able to search through all chat history for any and all users of a domain.
-
Exchange Web Services (EWS): Select this option to enable users on the domain to synchronize SmarterMail with supported email clients using Exchange Web Services (EWS). For domains that will support inboxes with large volumes of email, IMAP is encouraged as the primary protocol as EWS does not perform well with large amounts of email. Note: This feature is only available when licensed with SmarterMail Enterprise.
-
File Storage: Select this option to allow users to access the File Storage section, where users can upload files to the mail server and then share them by sending out links to those files.
-
Global Address List: Select this option to provide a listing of all users who have accounts for the particular domain in the Contacts menu icon. If the Global Address List is disabled for a domain, collaboration items, like calendars or notes, will not use autocomplete when adding shared users. Note: This feature is only available when licensed with SmarterMail Enterprise.
-
Login Display Customization: Select this option to allow domain administrators to customize the login screen to add a company logo, provide additional branding text, or adjust the default “Login to SmarterMail” text.
-
Team Workspaces: Select this option to allow users to create Team Workspaces, which allow for video chatting, shared documents and a collaborative whiteboard with users on the domain and guests alike.
-
SMTP Accounts: Select this option to allow users to send email from a third-party mail server account right from within SmarterMail. When enabled, this setting can be managed by domain administrators as well.
Autodiscover
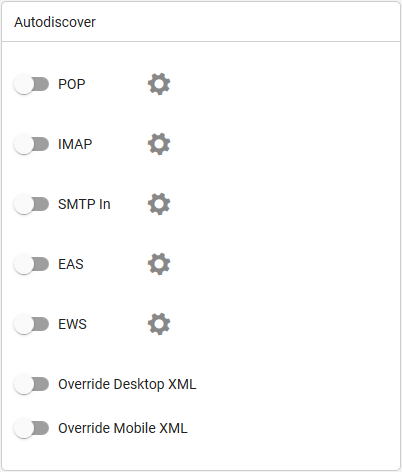
Autodiscover is a service that allows email clients to automatically determine a user’s mail server address and port from that user’s email address and password alone. This greatly simplifies a user’s setup process when attempting to connect SmarterMail to a desktop client, like Outlook and Windows Mail, as well as mobile clients on their iPhone, Android phone, and other mobile devices. Autodiscover settings can be configured per protocol and per domain.
You can configure an Autodiscover response for the following protocols and adjust their respective ports using the gear icon to the right:
- POP
- IMAP
- SMTP In
- EAS
- EWS
Administrators, who need more control over the desktop and mobile XML configuration files, must adjust the XML files themselves. To enable this action, you must turn on the ‘Override Desktop XML’ or ‘Override Mobile XML’.
Note: We only recommend this action for administrators who have advanced knowledge of XML responses used with Autodiscover.
Source: Smartermail.com
Using The Propagate Button
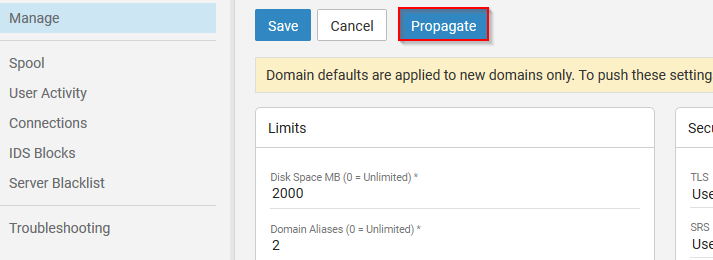
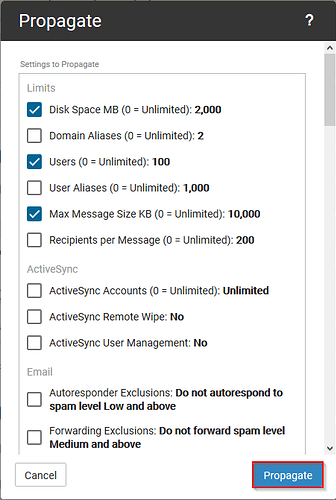
Implementing these change will only affect newly created users unless you select the blue ‘propagate’ button to the right of the ‘Save’ and ‘Cancel’ buttons. The propagate button will push these settings to all of the domains.
To utilize the propagate functionality, please follow the steps below:
-
Implement your changes to the domain defaults, then select the ‘Propagate’ button.
-
In the following dialog box, select which settings you are wanting to push and then select what users, or all of the users, to receive those changes.
Note: Pushing these settings to the existing domains will override unique changes that have been implemented previously. So only propagate settings that will not negatively affect the existing domains.

