In this tutorial topic we’ll be discussing how to create and manage additional Smartermail administrator users.
If you are instead looking for a tutorial on resetting the ‘admin’ SmarterMail user password then please click here.
Manage Administrator Logins for SmarterMail
-
Login to the Smartermail ‘admin’ user for your server. You can view our guide on logging in or recovering your password if needed.
-
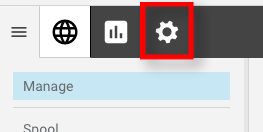
Once logged in click on the Gear icon for ‘Settings’.
-
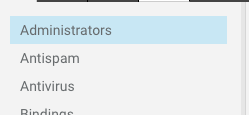
You will then click on the option for ‘Administrators’ (if it is not already selected).
-
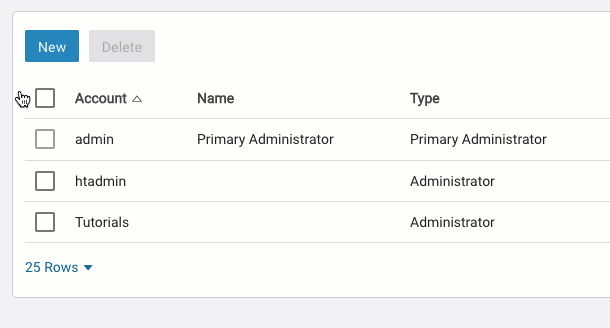
You should now see a list of existing SmarterMail Administrator users.
Note: You’ll notice there it an ‘HTAdmin’ user. This is the user that the WCP control panel connects to in order to perform task such as creating and managing users easily through the control panel. Removing this user will break this control panel functionality.

Add User
-
To add a new user click on the ‘New’ button as shown in the screenshot below.

-
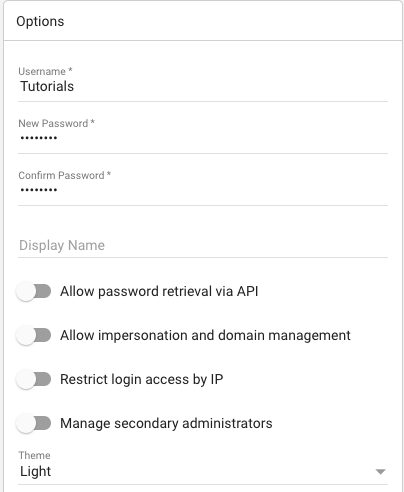
You should now see under the ‘Options’ tab a few choices to make for the new user such as the username, password, display name, etc…
We’ll go over each of the available options beneath the screenshot:
-
Username: This is the name of the user, which you will use to login.
-
New Password: This is the password for the above mentioned user. Make this strong since this will be an administrator user.
-
Confirm Password: Confirm the new password. This password much match what is in the ‘New Password’ field.
-
Display Name: This is the name displayed to you when logged into the SmarterMail account.
-
Allow password retrieval via API: Using the API you will be able to obtain the existing passwords for different users under this SmarterMail server.
-
Allow Impersonation / Domain Management: Allows the user to act as if they are a specific user as well as control domain level settings.
-
Restrict Login access via IP: If choosing this option the field for ‘IP Restrictions’ will become available and you can lock down access to this user to specific IP Addresses.
-
Manage Secondary Administrators: Gives the user the ability to manage other administrator users. This does not give them access to manage the main ‘Admin’ user, however.
-
Theme: Chooses the theme setting for the user, whether they wish to have the ‘light’ or ‘dark’ theme displayed.
-
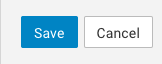
Once you’re satisfied with your input click on the ‘Save’ button.
Update Existing User
-
To update an existing user just click on the user you wish to update. You will be automatically taken to the settings for this user.
See GIF image below for example:
Delete Existing User
-
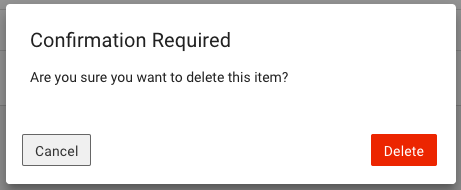
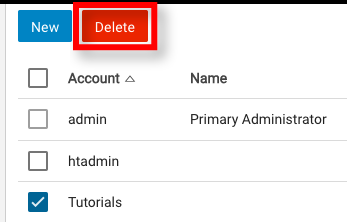
To delete an existing user click the check box next to the desired user and then click the ‘Delete’ button, as shown in the screenshot below.
-
You will be presented a follow-up confirmation box asking if you wish to confirm the deletion. Choose ‘Delete’ once more to remove this user completely.
Note: The ‘HTAdmin’ user is used for the WCP control panel to communicate to your SmarterMail server. Please do not remove this user, otherwise functionality for managing your domains email through the control panel can become unavailable.